|
|
There
is a right way
and at least a
half dozen wrong
ways to hand fabricate
and install a copper
roof. Seams are
important! Joints
are important!
Asthetic value
- important. Long
life - important!
The correct installation
is ... you guessed
it ... important!
|
|
|
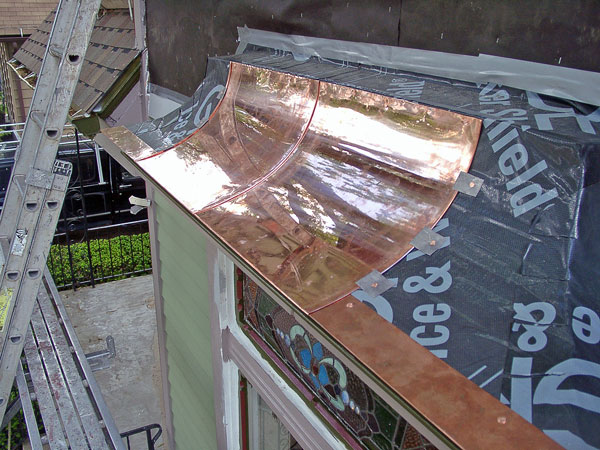
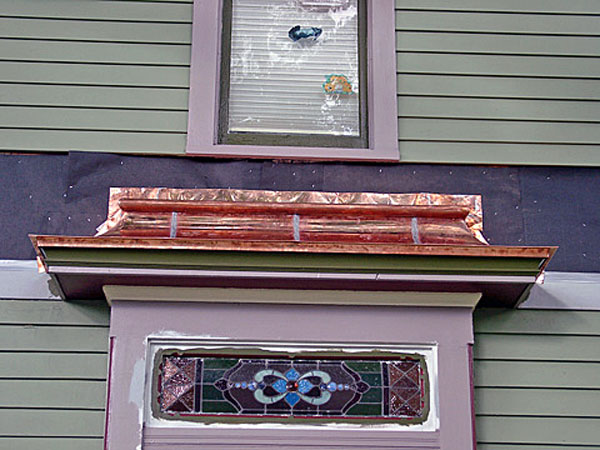
Copper
drip edge is
handmade and
essential to
proper water
shedding.
|
|
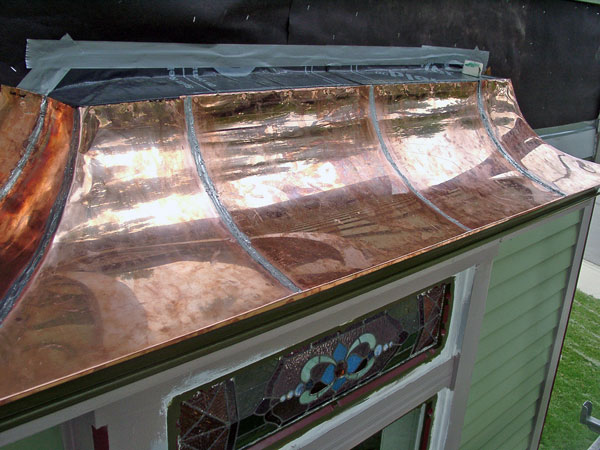
All
running seams
are hand rolled
and pressed -
by the book -
no leaks here!
|
|
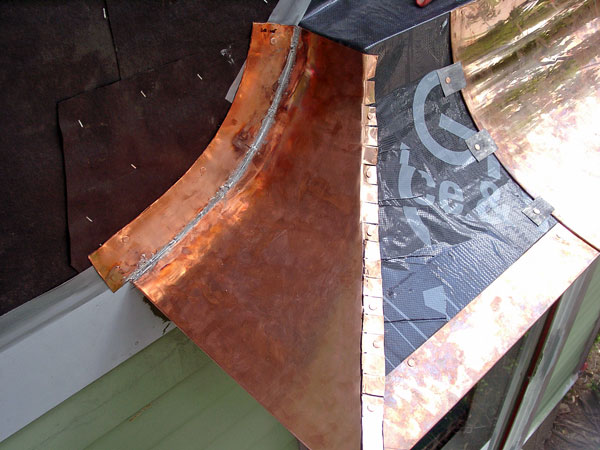
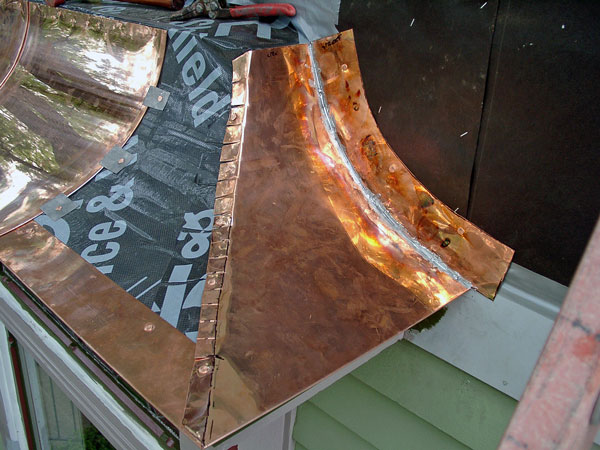
Corners,
trim and other
joints are all
hand soldered.
Notice the use
of copper nails
to secure the
roof to the structure.
You don't want
to mix metals
here due to oxidation
occuring between
different metals. We
also use heavy
duty "ice
and water shield" underlayment
which guarantees
there will be
no leaks as a
result of the
typical ice/water
dams we get up
here in the north
country.
|
|
|
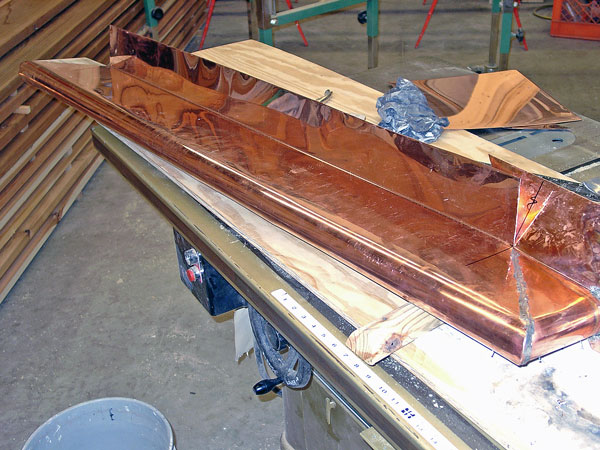
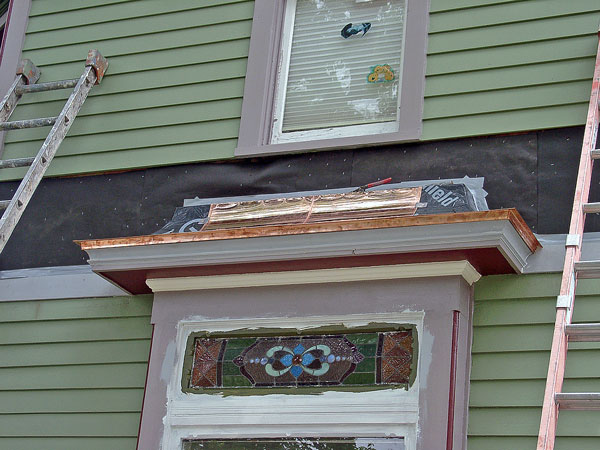
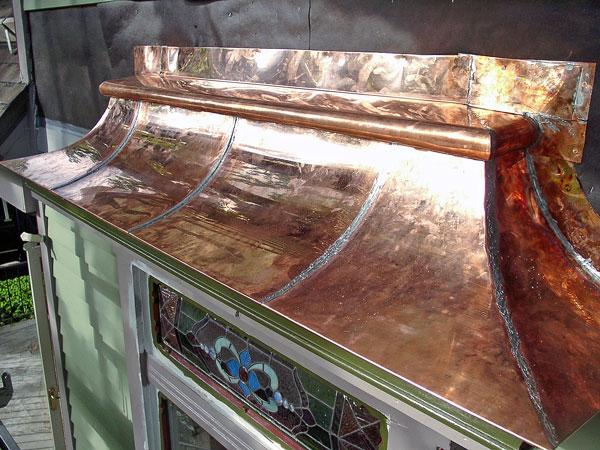
The
roof cap is handmade
in our shop under
controlled conditions.
Precision, with
finesse is the name of the game here.
You can't rush this type of work.
|
|
|
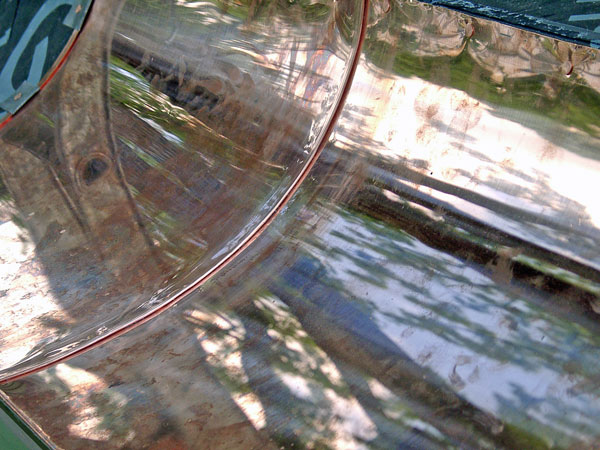
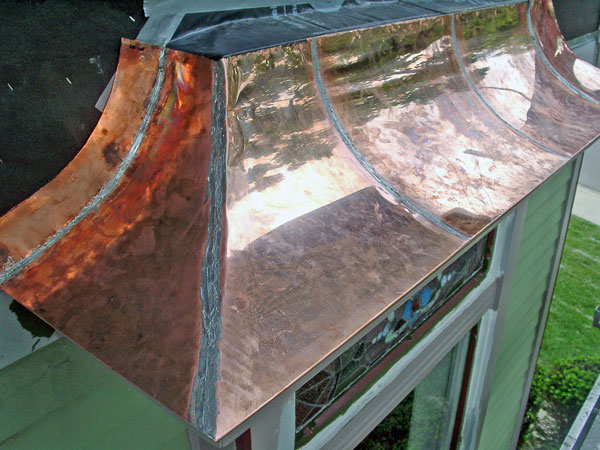
John
is fussy and
takes a lot of
pride in doing
the job right
- and making
it look good!
Notice how smooth and sharp the corners
and edges are.
|
|
|
|
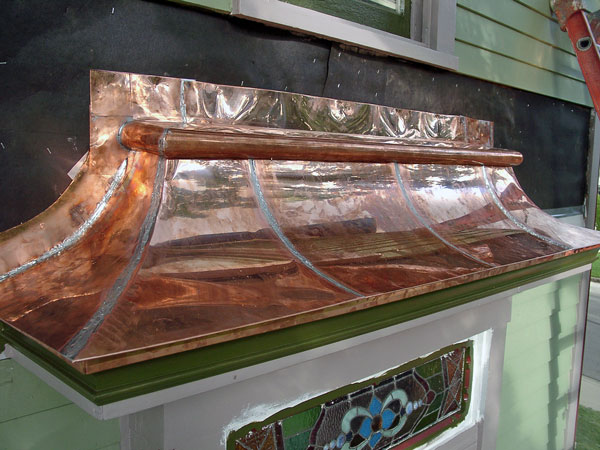
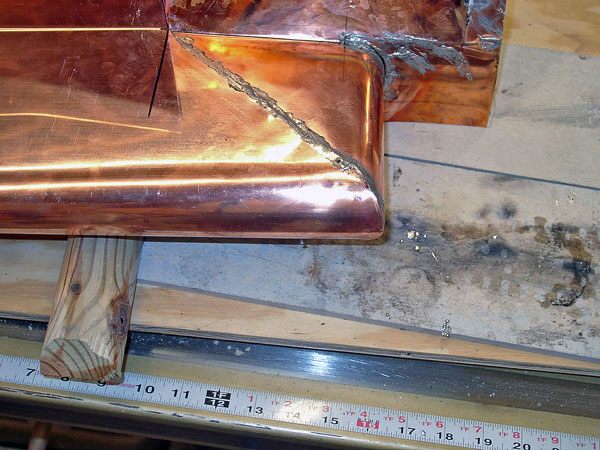
In
using modern
technology to
facilitate old
world techniques
John's skills
in hand soldering
lead into the
seams not only
makes them water
tight, but his
natural artistic
skills allow
for the clean
lines of the
Mansard Window
Cap to show.
|